Ensuring the safety of your home and loved ones is paramount, and a significant aspect of this is safeguarding your electrical system. Standard electrical outlets, which are essential for powering various appliances and charging devices, can sometimes present a risk of electrocution. Installing Ground Fault Circuit Interrupter (GFCI) outlets is a wise choice to mitigate this risk, particularly in moisture-prone areas.
What is a GFCI Outlet?
A GFCI outlet is specifically designed for use in areas like bathrooms and kitchens, where the presence of water is common. Water’s high conductivity heightens the risk of electrocution. A GFCI outlet is engineered to detect electrical faults and responds by immediately tripping and cutting off power to any device that’s plugged in. This rapid response halts the flow of electricity through the device or its cord, providing a crucial safety measure in case of direct contact.
Before you start installing a GFCI outlet, it’s essential to be thoroughly prepared. This guide will lead you through the necessary steps to ensure a smooth and safe installation. We’ll cover:
- Gathering the required tools and materials
- Switching off the power
- Removing the existing outlet
- Preparing the wiring
- Testing the new outlet and securing the cover plate
Need a pro to help safeguard your home from electrical risks?
When performing electrical work, it’s best to leave risky jobs to the pros. Visit our site today to browse our electrical services. Backed by thousands of 5-star reviews, Jon Wayne is the most trusted electrical company of countless homeowners like you.
Gather the Necessary Tools & Materials
Before beginning the installation process, ensure you have the right tools and materials. Gathering the necessary equipment ahead of time can help the process go as smoothly as possible. Here’s a complete list of all the materials you’ll need:
- Voltage tester
- Screwdriver (Phillips & flat-head)
- Wire stripper
- Needle-nose pliers
- Wire nuts
- Electrical tape
- GFCI outlet
- Circuit tester
- Work gloves
- Wire connectors
- Electrical box (if replacing a standard outlet)
- Outlet cover plate
Turn Off the Power
For your safety, always shut off the power supply before installing an outlet. You’ll first need to locate your home’s main service panel to do this. Next, find the correct circuit breaker inside the circuit box. Confirming that the breaker you’re shutting off is connected to the respective circuit you want to replace is important. To be sure, use a voltage tester to test the circuit breaker. If it still shows current, you likely shut off the wrong switch.
Keep looking for the right breaker and continue testing it until there’s no current displayed on the voltage tester. Once you’ve located it, make sure the switch is flipped to the OFF position.
Remove the Existing Outlet
Now the power is shut off, you’re ready to replace the existing outlet. Begin by removing the wall plate. To do this, use your screwdriver to unscrew the mounting screws. Be careful not to make contact with any terminals or wires. Once the mounting screws are unscrewed, you should feel the wall plate loosen. Be gentle while pulling out the receptacle.
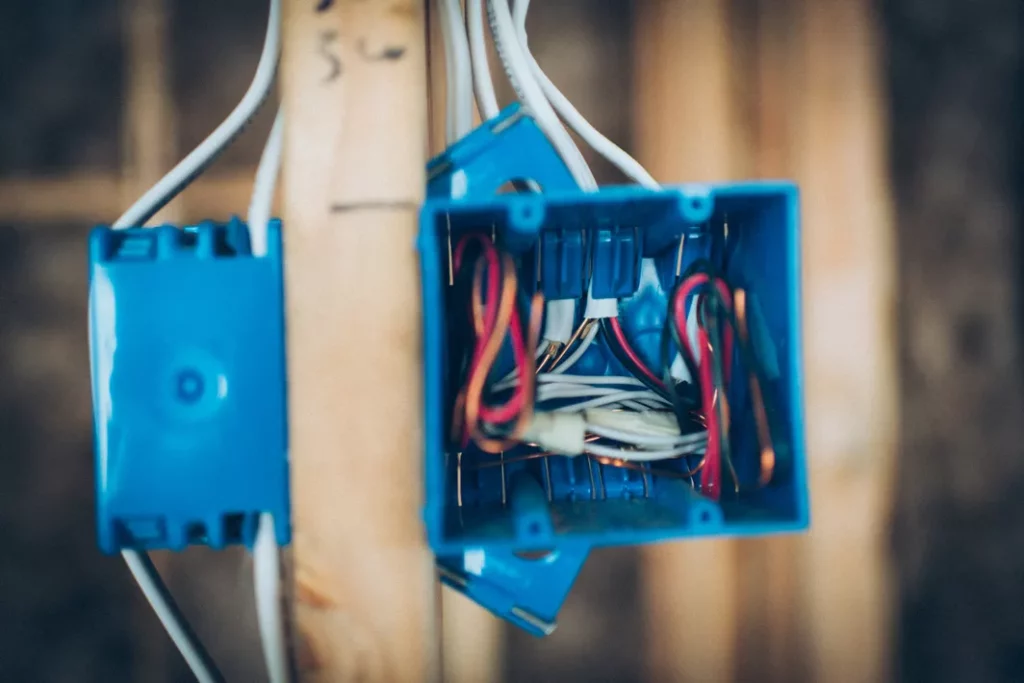
Prepare the Wires
Once the plate is out of the way, you can move on to the wires. First, unscrew the terminals and pull out the wires while being careful not to twist them. Keep an eye out for any damaged wires. If one looks like it’s twisted or nicked, use a wire stripping tool to fix it.
Finally, cut off the end of the affected wire before stripping it. After you’ve removed the old wires, begin rewiring the new outlet in the same fashion as the old one. Ensure all the white wires are connected to silver terminals and the black wires are connected to brass terminals.
Test the New Outlet and Put the Cover Plate On
After pushing the outlet back into the box, tighten the mounting screws and make sure the wall plate is flush. Confirm the receptacle is securely in place before restoring power to the outlet. To ensure that the GFCI outlet is receiving power, use a voltage tester. If it shows current, your outlet is properly functioning.
Get the expert help you need while installing a GFCI outlet.
Although DIY-ing the GFCI outlet installation process might sound convenient, it’s important to know when to call in the pros. Our electricians do the job right the first time and follow essential safety precautions for your peace of mind.